
So remember my friends Weather (Wan and Heather for the uninitiated)? When Heather was planning their wedding she mentioned that she was allergic to flowers and was planning to use paper flowers in her bouquets. She showed me a few she liked on Etsy and before I knew it I’d offered to make them. As the day got closer I started to worry a bit about the job I’d offered to do. I was worried I wouldn’t be able to make the bouquets look as good as the ones Heather liked and I was also that they wouldn’t stay together on the day.
However, they did. The actually looked much better at the end of the day than I thought they might and I think Heather was happy with the way they turned out – which is the important thing.
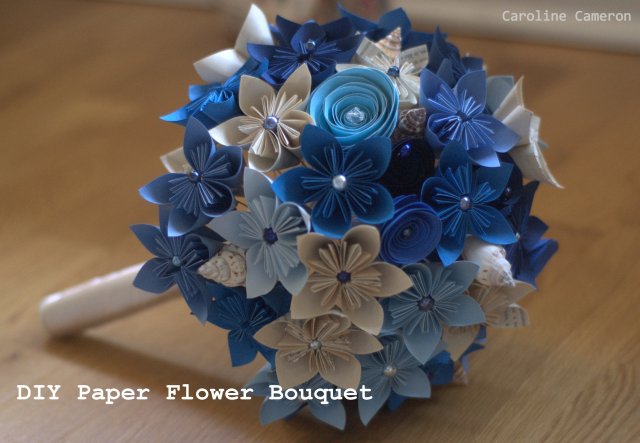
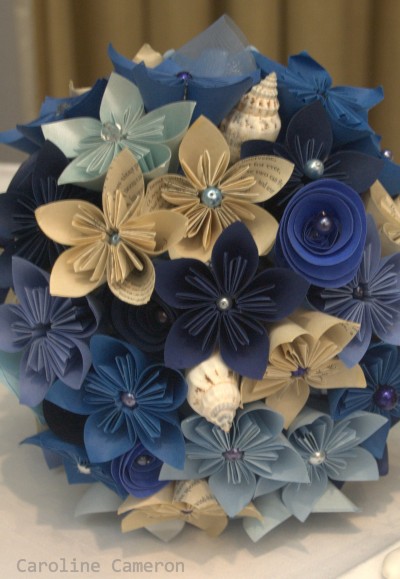
When I was researching the flowers I found lots of tutorials on how to make the flowers themselves – I used this one and this one. I stuck mine with strong double sided tape which worked well and meant I didn’t have to wait for the petals to dry before I put the flowers together. You need strong tape but not the super strong stuff if that makes sense. I found that thinner paper worked much better. I actually used a book of wedding poems which Greig and I used at our wedding to make the ‘wordy’ flowers. The book was older (8 years!) so had a vintage look. The other paper was a mixture of stuff I had in my stash and stuff I bought from Hobbycraft. Some thicker stuff was relegated early on as it was too hard to fold. The bridesmaid bouquets were all one colour – a light blue paper with a slight stripe I bought online. It was on clearance and cheap so I bought in on a whim and it turned out to be a perfect colour match and thin enough to work.
When it came to making the flowers into an actual bouquet I was kind of on my own. I found some advice online so armed with that and a bit of trial and error I set about putting it together.
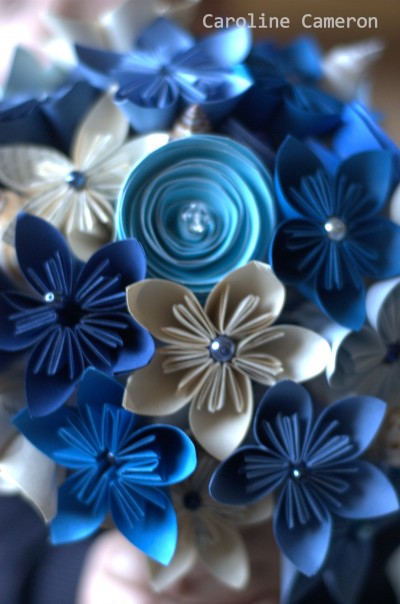
I put a wire through the centre of each flower and then glued a pearl of crystal onto each. I used Gorilla glue and as far as I know they all stayed put so it must have been strong enough. Actually I know it was strong enough after I glued a pearl to my hand. Lesson learned.
I wrapped a bit of double-sided tape around the top of the wire near the pearl and slid the flower up. I gently squished it to stick it in place. It was useful to have a bit of movement later on when I was arranging the flowers so this kind of loose fixing made sense.
I used a mixture of beads and crystals I bought in the jewellery making section on Hobbycraft for the bride’s bouquet and my secret weapon for the bridesmaids flowers were to cut up some pearly bracelets I bought at a discount shop. They were grey, glass pearls and were exactly the same as the one’s I’d already purchased for about a quarter of the price.
I also wanted to include some shells in the bouquet to tie in with the beach theme of the wedding and I used some from the beach where I took the photo for the wedding invitation tag and some I bought. I glued them straight onto the floral wire and again they held up really well.
When I had enough flowers I joined three together. I used poundshop electrical tape to bind them together. You can thank Greig for this wonderful discovery – his idea and it worked like a charm. It also meant when I had to start again it was really easy to take off again. I continued adding more and more flowers but I quickly realised the bouquet was too small. So I took them apart and tried again. This time it worked perfectly. I mixed the flowers as I went along and popped a shell in here or there. I tried to bunch them quite tightly so there no gaps but not squash them too much. Being able to bend the wire made changing it as I went easy.
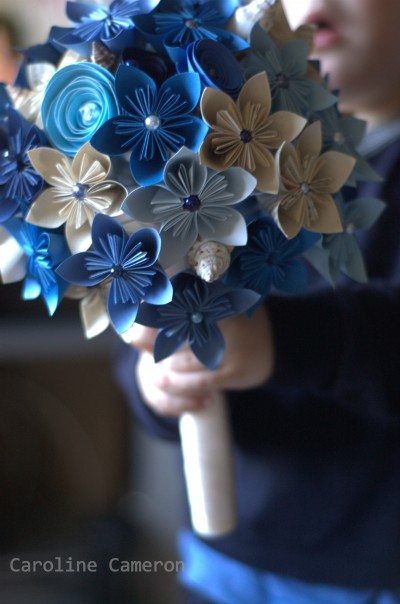
(bouquet modelled by small boy who thought it was very heavy)
I made the three bridesmaids bouquets at the same time to get them roughly the same size. I ended up with one slightly larger but I don’t think it was noticeable to anyone other than me.
After I was happy with the flower placement I wrapped around more electrical tape. I cut a piece of craft foam big enough to wrap around the bouquet and stuck it on my double-sided tape. This made the handle soft to hold and I hope comfortable? The whole thing was quite heavy but I seem to remember that a real flower bouquet is pretty heavy too.
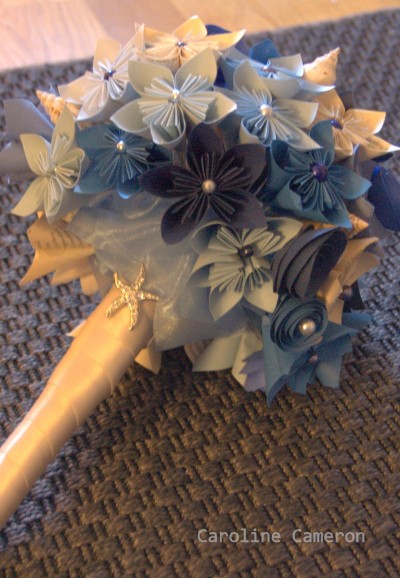
I wrapped double sided tape around the hold handle, unpeeling the sticky side as I went and then wrapped ribbon around the handle. This bit was actually pretty tricky and took a few tries. I started at the bottom and secured it at the top with more gorilla glue. I used ivory ribbon for the bridal bouquet and navy for the bridesmaids to match their dresses. I then glued buttons to the bottom of the handles, a something blue for the bride and navy for the bridesmaids. As we’d used starfish on the invites when I saw a little sparkly starfish I knew it would be a finishing touch for Heather’s bouquet so I sewed that on later.
Lastly I bought some pale blue, very wide chiffon ribbon at Hobbycraft and had a go at weaving it in and out of the wires at the base of the bouquet. This helped disguise the wires and fill any dead space. I wasn’t sure if this step was necessary but I’m glad I did it, it mad the bouquets look much more ‘finished’.
I made some extra flowers to decorate the cake and make some simple buttonholes. I added shells and starfish to the buttonholes and added some rustic twine to make them more manly. Is that possible?
A beautiful Bridal Party no?

photo credit Adam Jackson
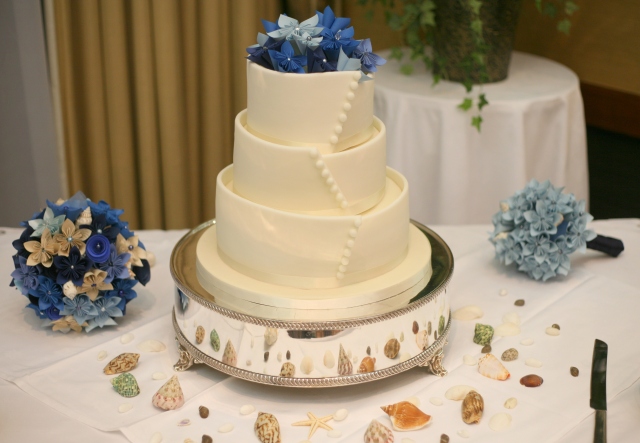
photo credit Adam Jackson
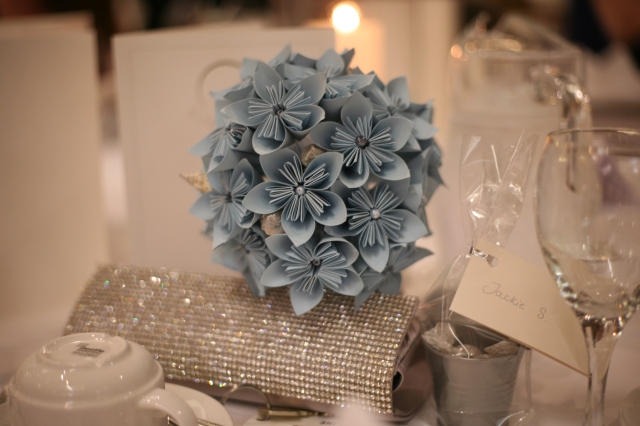
photo credit Adam Jackson
If you are keen to diy a paper flower bouquet I would go for it as long as you have enough time. The flowers are simple to fold and putting it all together was not as difficult as I thought. Making these for my friends was a labour of love and was worth every folding minute.
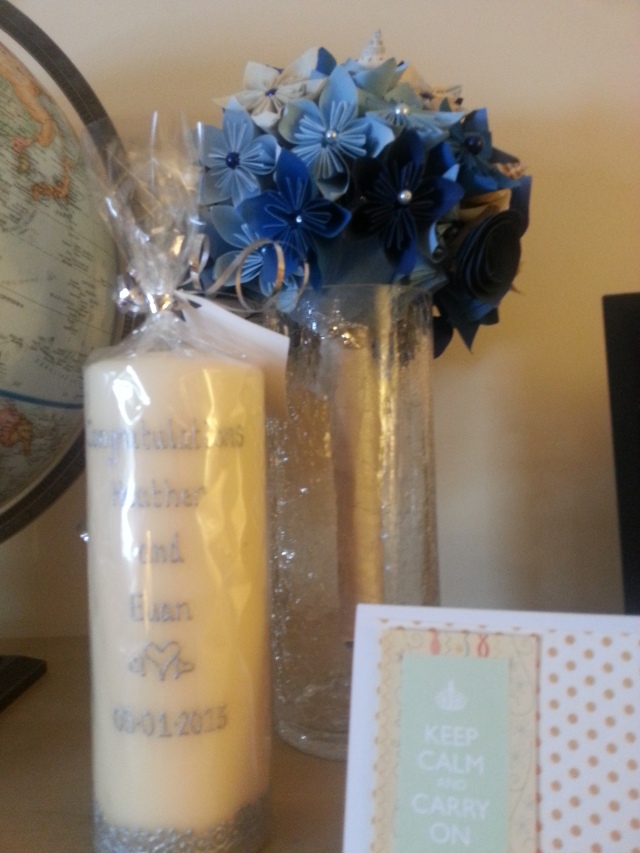
Update Feb 2013, Heather sent me this photo of her bouquet displayed at home – still intact!


Beautiful flowers- you are talented. M x
hello Caroline, the bouquet is absolutely gorgeous, I am trying to make one for my wedding (in May and blue 🙂 ) but I`m struggling a bit with the "assembling" it does not look so pretty, do you by chance have any tutorial (on the final work, I know how to prepare the invidivual flowers:) ?thank you very much in advance Petra
Hi Petra, I don’t have a tutorial sorry, because I didn’t take pictures as I went along. I basically made a small bouquet of 8 or 9 flowers to start with and then added little bunches as I went, trying to keep a ball like shape as I went. I did have to take it all apart a few times before I was happy with it. Sorry I couldn’t be more help and good luck!